To do so, we're going to begin creating lights. I won't go into tremendous detail about the settings on lights, but let's at least walk through the basic process of creating and editing a light. To create a Point Light, go to the Create menu --> Lights --> Point Light. Once created, you'll be able to translate, rotate, and scale a light just like you would any other object. Opening up the Attribute Editor (third button from the top right) you'll see some new settings under the lightShape tab (if you created a Point Light it will be the pointLightShape1 tab).
If you can't see your lights in the Maya view panel yet remember to set the shading mode to Smooth Shade All under your view panel's Shading menu. Then check the Lighting menu of your view panel and check the Use All Lights option. You should get a rudimentary preview of your lighting in the view panel now.
Adjust the color, intensity, and shadow options to produce your desired light effects. When you're ready, switch the light to either a Spot Light or Directional Light to give yourself the ability to aim it for a more specific effect. Remember that a Directional Light will shine light on the scene from every position at the same angle while a Spot Light will only shine light in the chosen direction from within its falloff cone.
Shadow options are accessible from the Shadows section of your light's attribute editor. Simply click to expand. You'll see options for Shadow Color, Resolution, and Filter Size among a myriad other buttons and sliders. Those are your three primary shadow controls, but you will need to first check Use Depth Mapped Shadows before any of those become available.
The most basic lighting setup is typically composed of 3 lights: a Key, a Fill, and a Rim (also called a Back light). Your Key light determines the main lighting direction of your scene and the primary color of the light. Your Fill light should be somewhere to the side of the Key light, adding extra light around the edges and "filling in" the darkest areas not lit by your Key. The Rim light is used to cast an alternative and sometimes contrasting hue from the reverse direction of the Key light. Your Rim light will often be very dim or use a darker color to establish a variation on the default black which typically represents unlit areas of the scene.
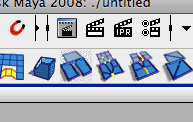
Advanced effects like shadows won't show up in your view panel, so when you like your basic lighting setup you should start using the Render button to see what the final result looks like (it's the black and white one that looks like a film slate, 2nd from the left):

This will pull up the Render View window -- you can pan and zoom around your rendered image all you like using the regular Alt + MMB and Alt + RMB commands you use elsewhere in Maya. Also note the Keep Image / Remove Image buttons (the little down/up arrow symbols near the right edge of the image below): they will let you store completed renders to check against future changes. Whenever you press Keep Image it will be added to a slideshow cue which you can scroll through using the slider at the bottom of the Render View window.
From the Render View window's File menu you can choose to save your image to a file with the Save Image As... command. Remember to change the Image Type to something other than the default ".iff" format. JPEGs will be fine for this class.
When you are satisfied with your work email me one image of your rendered scene and your Maya scene file with the names firstName_HW02.jpg and firstName_HW02.ma, respectively. Remember: have fun with this assignment! The tools for lighting/rendering at this level are fairly simple, so just go wild and experiement with lights and their settings.
